How to Choose a 3 Way Switch Dimmer in 2026?

Choosing a 3 Way Switch Dimmer in 2026 requires more than comparing prices or matching a stylish wall plate. Lighting now sits within a broader efficiency discussion. The International Energy Agency reports that lighting represents roughly 15% of global electricity consumption, while the U.S. Department of Energy states that LED products can use at least 75% less energy than incandescent lamps. These figures do not prove that every dimmer saves energy. They show why compatibility matters.

A reliable selection begins with the lamp, circuit, and installation conditions. Confirm whether the circuit has two control locations, then choose a dimmer specifically rated for 3-way operation. Check LED wattage, minimum load, neutral-wire requirements, and the manufacturer’s approved bulb list. Look for recognized safety certification, such as UL or ETL listing in applicable markets. The National Electrical Manufacturers Association and ENERGY STAR guidance also emphasize product performance, controls, and verified efficiency rather than marketing claims. A qualified electrician should inspect older wiring, especially in homes with loose connections or crowded wall boxes.

Real-world behavior can be less tidy. Some LED lamps flicker at low settings, buzz behind the plate, or fail to reach a comfortable night-light level. A 3 Way Switch Dimmer may work perfectly in one room and perform poorly with another lamp brand. That is frustrating, but it is useful evidence. This guide will compare dimming technology, load ratings, wiring needs, safety certifications, and smart-home features. It will also question popular assumptions, because the most expensive model is not automatically the best fit. Always follow local electrical rules and the product instructions before installation.

How to Choose a 3 Way Switch Dimmer in 2026?

What Is a 3-Way Switch Dimmer and How Does It Work?

A 3-way switch dimmer controls one light from two different locations. Imagine a hallway with switches at both ends. One control usually adjusts brightness, while the second turns the light on or off. The switches communicate through traveler wires, with one common terminal directing the circuit. It is not a timer.

Unlike a basic switch, a dimmer changes electrical output to the lamp. The light then produces more or less brightness. In many installations, only one dimmer is used with a compatible 3-way companion switch. Some systems allow dimming from both locations, but that feature must be clearly supported. A dimmer rated for LED lighting is important because mismatched loads may cause flickering, buzzing, or a narrow adjustment range. Check the load.

When choosing a 3-way switch dimmer in 2026, inspect the wiring before buying. Some models require a neutral wire, while older wall boxes may not contain one. Turn off the breaker and verify the wires with a proper tester. Never rely only on the switch position. I once assumed two similar wires were interchangeable; that mistake created unnecessary troubleshooting. The common wire must return to the correct terminal. Follow the installation instructions and local electrical requirements. A qualified electrician is the safer choice when the wiring is unclear, crowded, or damaged. Test the dimmer at low, medium, and full brightness, since performance can change under different loads.

How to Choose a 3-Way Switch Dimmer in 2026?

What Is a 3-Way Switch Dimmer and How Does It Work?

A 3-way dimmer allows one light fixture to be controlled from two locations. One location normally contains the dimmer, while the second uses a compatible 3-way switch. The dimmer regulates the power delivered to the lamp, and the traveler wires transfer the control signal between the two switch locations.

The chart shows commonly published residential load ratings for dimmers in this category: up to 600 W for incandescent or halogen lighting and approximately 150 W for LED or CFL lighting. Actual ratings vary by device, circuit voltage, lamp type, and installation conditions. Always verify the product label and confirm that the dimmer is rated for 3-way use.

Check Wiring Compatibility, Load Types, and Electrical Ratings

How to Choose a 3 Way Switch Dimmer in 2026?

Start by checking the existing wiring before choosing a 3-way dimmer. Turn off the breaker, then verify the circuit with a voltage tester. A typical 3-way circuit includes line, load, traveler, and ground wires. Some dimmers also require a neutral wire. Do not assume the white wire is neutral. Older installations may use it differently. Photograph the wiring before removal, but rely on testing, not memory. The dimmer must match the circuit arrangement and may require a compatible companion switch at the other location.

Load type matters just as much. Confirm that the dimmer supports LED lamps, rather than only incandescent or halogen loads. Check the package for minimum and maximum wattage, voltage, current, and load-type ratings. Four LED bulbs may still flicker if their combined load falls below the dimmer’s minimum rating. Magnetic or electronic low-voltage lighting needs the correct control type. Never connect incompatible loads.

Heat is a warning sign.

Review derating rules when several devices share one electrical box. The dimmer also needs enough box space for its wires and connectors. Choose a device with recognized safety certification and installation instructions that match your supply voltage. Local electrical requirements can differ, so a qualified electrician should inspect uncertain wiring. I would not skip that step. A neat wall plate cannot correct a misidentified conductor or an overloaded circuit.

Compare Dimmer Features, Controls, and Smart Home Options

How to Choose a 3 Way Switch Dimmer in 2026?

A 3-way dimmer must match both the circuit and the lighting load. Check whether the fixture uses dimmable LED bulbs, incandescent lamps, or mixed loads. LED systems may flicker when the dimmer’s minimum load is too high. Confirm the wiring type, traveler layout, neutral-wire requirement, and maximum wattage before purchase. Test before buying. That detail matters.

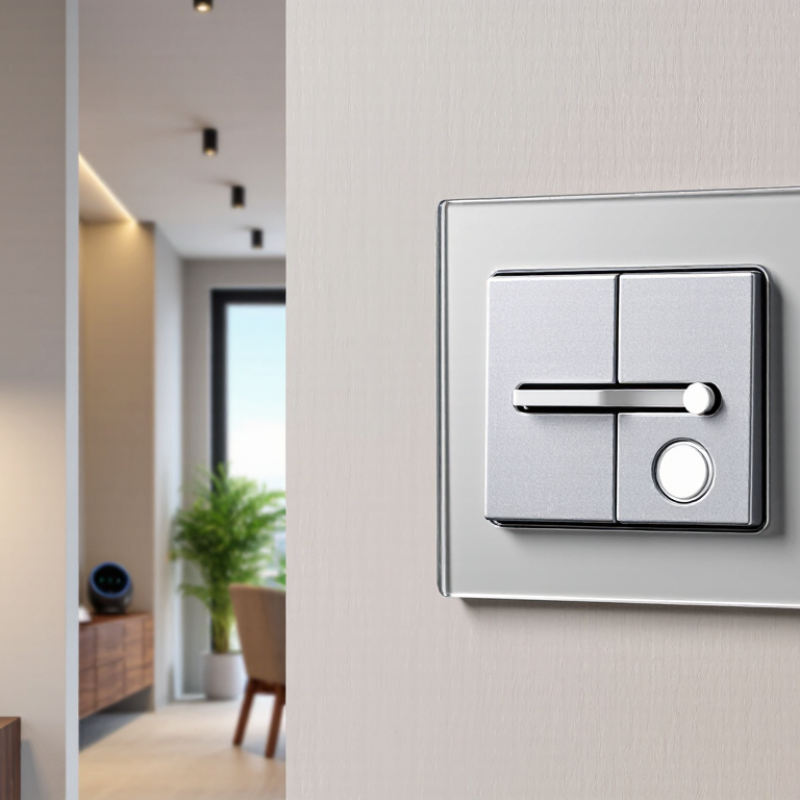
Control options now range from a smooth slide control to a press-and-turn dial. A paddle design suits hallways, while a small dial offers finer brightness changes near a reading chair. Some dimmers remember the last setting, provide fade-on timing, or include a locator light. Smart models may support app control, schedules, voice commands, and energy reports. A hub-free model is simpler, but a hub-based system can provide broader automation.

Smart home compatibility needs careful comparison. Look for support across your existing platform, secure wireless updates, local control, and a reliable manual override. A neutral wire can improve performance, yet older homes may not have one in every switch box. Professional verification is worthwhile when wiring is unclear. A common mistake is choosing advanced features before checking basic compatibility. I would prioritize stable dimming over decorative controls, because a beautiful interface cannot fix buzzing, flicker, or an overloaded circuit.

Choose the Right Design, Installation Method, and Safety Certifications

How to Choose a 3 Way Switch Dimmer in 2026?

Choosing a three-way dimmer is not only about matching the wall plate. Check the lamp type, wattage range, neutral-wire requirement, and multi-location compatibility. A dimmer designed for LED loads may behave poorly with older bulbs. Flicker matters. The U.S. Department of Energy’s 2023 solid-state lighting analysis reports that lighting uses roughly 15% of U.S. electricity, so efficient control deserves careful attention. Select a design that gives clear tactile feedback and fits the room’s moisture and heat conditions.

Installation quality is equally important. Turn off the circuit, confirm it with a tester, and photograph existing terminals before disconnecting wires. Some three-way dimmers require a companion switch, while others support a compatible multi-location control. Never trust wire color alone. NFPA’s Home Fires Involving Electrical Distribution and Lighting Equipment report estimates about 32,620 related home fires annually from 2016 to 2020. A rushed retrofit can look tidy and still create heat or buzzing.

Look for safety marks supported by recognized standards, such as UL 1472, CSA C22.2 No. 184.1, or IEC 60669-2-1, depending on your region. Verify the exact model number in the certification database. The label alone is not enough. Check the product’s rated load, short-circuit protection, and installation instructions. I would still ask a licensed electrician when wiring is confusing, especially in older homes. No checklist is perfect. Read the manual twice.

Test the Dimmer and Troubleshoot Common 3-Way Wiring Issues

When choosing a 3-way switch dimmer in 2026, test the circuit before judging its performance. Turn off the breaker and confirm the wires are dead with a voltage tester. Do not rely on the wall switch alone. Photograph the original wiring, then identify the common wire before disconnecting anything.

A 3-way dimmer usually replaces one switch, while the second switch remains a compatible 3-way control. Connect the common wire correctly. The two traveler wires must stay on the traveler terminals. A reversed common connection can make the light work from only one location. I once missed this detail during a repair. It cost extra testing time.

Restore power and raise the dimmer slowly. Watch for flickering, buzzing, delayed lighting, or a switch that feels unusually warm. Test the light from both locations. If the lamp stays dark, check the breaker, wire connections, lamp compatibility, and load range. If the light flickers, try a different dimmable lamp or reduce the connected load. Some dimmers require a neutral wire, while older boxes may not provide one. Never guess. Consult the wiring diagram and local electrical requirements. A loose terminal can also create intermittent behavior, which is easy to overlook. Test again after tightening every connection.

How to Choose a 3 Way Switch Dimmer in 2026? - Test the Dimmer and Troubleshoot Common 3-Way Wiring Issues

Category Evaluation Point Realistic Requirement or Test Result What to Check Before Installation
Selection Criteria
Electrical rating Voltage and load capacity For a typical residential circuit, verify that the dimmer is rated for the circuit voltage, commonly 120 V AC, and that the total connected load does not exceed its marked rating. Read the product label and installation instructions. Never select a dimmer based only on the light bulb wattage.
3-way compatibility Two-location control Choose a dimmer specifically listed for 3-way use. Some models require a compatible companion switch at the second location; an ordinary single-pole switch may not be permitted. Confirm whether the second device is a standard 3-way switch or a required companion control.
Bulb technology LED, CFL, halogen, or incandescent load LED lamps should be marked dimmable and listed as compatible with the dimmer. Incandescent and halogen lamps are generally resistive loads, while many CFL lamps require a dimmable version. Check the lamp packaging and the dimmer compatibility list. Do not assume every LED lamp will dim smoothly.
Minimum load Low-wattage LED operation Some dimmers require a minimum load. A small LED load can cause flicker, delayed turn-on, incomplete shutoff, or a limited dimming range. Compare the total LED wattage with the dimmer's stated minimum and maximum load requirements.
Neutral-wire requirement Existing box wiring Some electronic dimmers require a neutral conductor, while others are designed for installation without one. The presence of a white wire does not always mean it is a neutral. Turn off power and identify conductors by function, not by color alone. Consult a qualified electrician if wiring is unclear.
Heat and derating Multiple devices in one electrical box Electronic dimmers produce heat. Their allowable load can be reduced when installed beside other heat-producing devices or when the box has limited ventilation. Follow the manufacturer's derating table and maintain the required box capacity.
Control behavior Brightness range and memory Useful features may include a low-end adjustment, high-end adjustment, soft start, brightness memory, and an audible or tactile control that remains accessible in a 3-way arrangement. Confirm that the adjustment method is practical after the wall plate is installed.
Safety certification Approved construction Use a dimmer carrying a recognized electrical safety certification appropriate for the installation area and voltage. Inspect the device label and installation documentation before purchase.
Safe Testing Procedure
Power isolation Shut off the circuit Switch off the circuit breaker, then verify that the box is de-energized with a properly functioning voltage tester. Test the tester on a known energized source before and after checking the circuit.
Conductor identification Find line, load, travelers, neutral, and ground In a conventional 3-way circuit, two traveler wires run between the switches. The common terminal is connected to either the incoming line or the switched load, depending on the switch location. Photograph and label existing wires before disconnecting anything. Terminal position matters more than wire color.
Ground continuity Equipment grounding path The metal mounting yoke or grounding lead must be connected to the equipment grounding conductor as required by the installation method. Do not use the neutral conductor as a substitute for equipment grounding.
Functional test Both locations operate the light After installation, the light should switch on and off from both locations. The dimmer should provide stable brightness without excessive buzzing, visible flicker, or heat buildup. Test the full dimming range with the lamps installed and the wall plate temporarily accessible.
Load test Observe the lamps at multiple brightness levels Test at approximately low, medium, and full brightness for at least several minutes. Watch for flicker, flashing, dropouts, delayed starting, or unexpected shutoff. If problems occur only at low brightness, use the dimmer's low-end adjustment if provided or reassess lamp compatibility.
Common Wiring Issues and Troubleshooting
Light stays on Dimmer does not fully switch off Possible causes include a misidentified common terminal, incorrect companion wiring, a required neutral that is not connected, or a small electronic leakage current interacting with LED lamps. Turn off power, recheck the common and traveler terminals, verify the wiring diagram, and confirm the dimmer's minimum-load and neutral requirements.
No light output Light does not turn on after installation Possible causes include an open circuit, loose wire, tripped breaker, failed lamp, incorrect common connection, or an incompatible companion switch. Check the breaker, lamp, line connection, common terminal, neutral connection if required, and all wire-nut or terminal connections with power off.
Only one location works 3-way control is incomplete A traveler may be loose or connected to the wrong terminal, or the dimmer may not support the installed second switch arrangement. Verify that the two traveler conductors are on the correct traveler terminals and that the common conductor is on the common terminal.
Flickering Brightness is unstable Common causes include incompatible LED lamps, an insufficient load, loose connections, electrical interference, or operation below the dimmer's stable low-end range. Tighten connections with power off, test with approved dimmable lamps, reduce the low-end setting, and check the compatibility requirements.
Buzzing or humming Audible noise from the dimmer or lamp A small amount of sound can occur with some loads, but loud or increasing noise may indicate load incompatibility, loose wiring, overheating, or an overloaded device. Turn off power if the device becomes unusually hot, smells burnt, shows discoloration, or produces a loud sound. Have the circuit inspected.
Breaker trips Protective device opens repeatedly Possible causes include a short circuit, incorrect conductor placement, damaged insulation, an overloaded circuit, or a faulty dimmer. Do not repeatedly reset the breaker. Disconnect the installation and obtain professional electrical assistance.
Limited dimming range Light will not dim low enough or reach full brightness The lamp and dimmer may have incompatible dimming curves, or the dimmer may need high-end or low-end calibration. Use compatible dimmable lamps, adjust the available calibration controls, and stay within the specified load range.
Warm enclosure Normal operating heat versus unsafe temperature A dimmer can feel warm during normal operation, but it should not become excessively hot, discolor the wall plate, or emit an odor. Check load size, box fill, derating requirements, ventilation, and terminal tightness. Stop use if overheating is suspected.
Final Selection Checklist
Before purchase Confirm essential specifications Recommended Match voltage, load type, minimum and maximum load, 3-way method, neutral requirement, box depth, safety certification, and lamp compatibility. Keep the circuit layout, lamp model information, and installation instructions available for comparison.
Before energizing Inspect the installation Recommended Check that connections are secure, conductors are not pinched, grounding is complete, and no bare copper is exposed outside the terminal area. Install the wall plate only after the wiring has passed inspection and the device is firmly mounted.
After installation Verify safe operation Recommended Test both switch locations, the complete brightness range, several on/off cycles, and several minutes of operation at the intended load. Stop using the dimmer if it sparks, overheats, smells abnormal, trips the breaker, or causes persistent lamp flicker.

Kontaktbox-Frau

  • CNC-STEP – Quick contact